The install process for getting TensorFlow up and running on your graphics card is rather involved. For a start you need a graphics card which can run CUDA and cudaCNN. You need an Nvidia card with a compute capability of at least 3.5 for a simple install process (all 9 and 10 series GeForce cards work but only some 7 and 8 series cards do). On top of that CUDA is quite fussy and does not like to be installed to environments that lack a compatible version of Visual Studio. Additionally TensorFlow for GPU is VERY fussy about who its friends are, each specific TensorFlow release works only with a specific version of CUDA. Also TensorFlow for GPU is fussy about which versions of various Python packages it needs to work (including specific versions of Python) which likely means you will want to install it in a Python virtual environment.
All of this can seem a little intimidating. Fortunately there is good documentation at hand, but it is split up over a number of sites. Therefore I have provided a walk through of how I got TensorFlow for GPU working on Windows 10 which is current as of July 2018
- First its a good idea to read the TensorFlow and CUDA installation guides to get an idea for what you are doing
- Check your GPU is compatible with a CUDA and has a compute capability of at least 3.5 and update the drivers
- Install Anaconda for Python 3.6
- Install Visual Studio Community 15 (this requires a Microsoft account, alternatively you could try a direct download from here but I have not tested this route). Note that VS community 17 is NOT listed as compatible at this time.
- Install the Visual Studio Community 15 patches 1 to 3 in order
- Install CUDA 9.0 from the Nvidia website using the installation guide (note that while CUDA 9.2 is now available it is NOT listed as compatible in the TensorFlow documentation)
- If you like (its not required) you can verify that CUDA is working correctly this needs you to build a file provided by Nvidia and run it. Instructions on how to do this can be found in section 4 of an earlier guide to installing Tensor Flow for GPUs
- Set up cudaNN. The files can be downloaded in a zip from the Nvidia developer site be careful to get the version for CUDA 9.0 (this requires a login, Nvidia revamped their developer site in 2018 so you may be able to log in with a standard Nvidia login, or you may need to sign up for a new ID, as I already had a developer login I can’t say) once you have downloaded the files they need to be copied to specific paths on your machine as detailed in the cudaNN documentation steps 1 to 3 for Windows. Also the documentation step 4 walks you through setting a path variable on your system, but I found mine had already been set correctly by the CUDA installer. Unless you are also using cudaNN in Visual Studio you can ignore step 5.
- As TensorFlow for GPU has some specific package dependencies we need to set up a Python virtual environment so that future package updates in your main environment don’t break it. Open an Anaconda Prompt window and issue the following instructions.
conda create -n tensorflow-gpu python numpy pandas matplotlib jupyter scikit-learn scikit-image scipy h5py

conda install cython

conda install -c conda-forge opencv

pip install --ignore-installed --upgrade tensorflow-gpu

conda install setuptools=39.1.0

pip install keras
This will create a virtual environment called tensorflow-gpu and install everything you need to get started with machine learning projects. Even though we have a copy of Anaconda installed, tensorflow-gpu and keras are PIP installed as per the TensorFlow recommendations not conda installed. Note that failure to install Cython leads to missing package warnings from TensorFlow. Failing to downgrade setuptools to 39.1.0 (its currently at 39.2.0 leads to incompatibility warnings from Keras). Also note that at the time of writing Anaconda installs Python 3.6 which is compatible with TensorFlow GPU 1.9.0 and Keras 2.2.0 which are the default installs using the commands above, if this changes in future you may need to append =versionnumber as required
- Now we need to add an extra environment to Jupyter so that we can use our new setup in notebooks, this is pretty simple and can be done in one line in the Anaconda Prompt window
python -m ipykernel install --user --name tensorflow-gpu --display-name "tensorflow-gpu"
- OK, finally we can try this out. Open Jupyter Notebook from the Anaconda Menu in the Windows Start mmenu. Either start a new project selecting your new tensorflow-gpu environment as shown below:

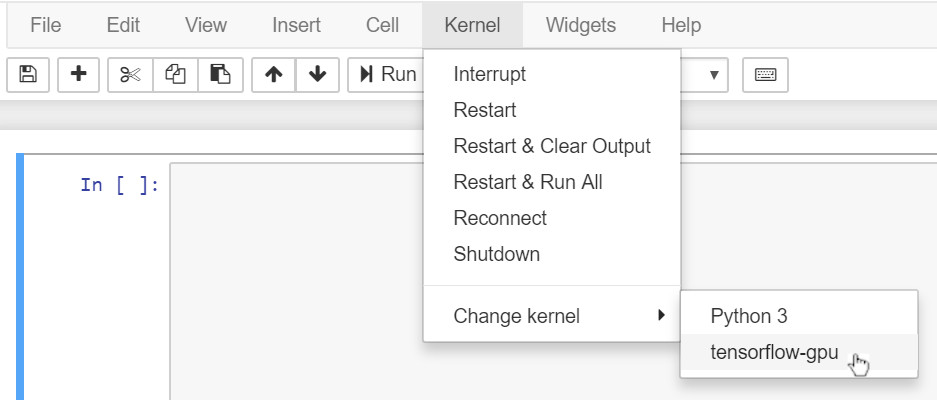
- Or alternatively open an existing project (which may need you to install further packages to your tensorflow-gpu environment of course) and once you have opened it, select your new kernel from the Kernel menu as shown:
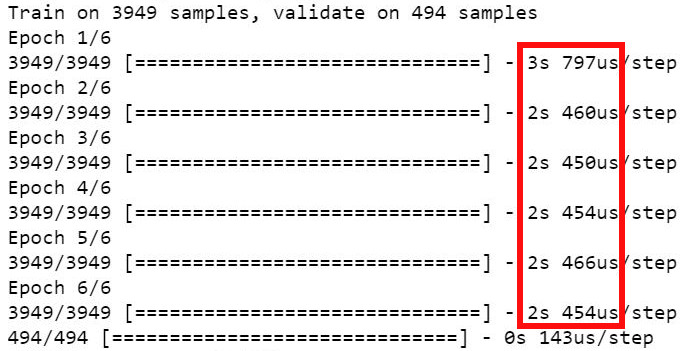
- Now run your code and admire the speed improvement
If you require further information or get stuck, this helpful guide to installing an earlier version of TensorFlow for GPU may help