GIMP 3.0 has been a long time coming. Now it is available to download, it brings with it a lot of handy new tools. Here are some of the neat new features available and ways to use them which I have found. I did not invent these tricks, I have just gathered some of the ones I find useful here for reference in future. Where possible I have referenced guides by other folks on how to implement them. This will likely turn into a living document with additional references as and when I find them useful.

Basic Setup
Basic setup and menus for GIMP 3 is not radically different to GIMP 2. However this video handily covers layer transparency, tool setup, key binds, unified transform, window management and a variety of other useful basics.
Layer Adjustments
Perhaps the biggest improvement in GIMP 3. Rather than applying filters destructively to a layer. Layer adjustments like filters and layer colour adjustments are now applied as a stack of filters on the layer. When a layer has adjustments applied you will see a small “Fx” symbol next to the layer in the layers toolbar. Clicking on the “Fx” will open the list of adjustments. You can reorganise them, alter their settings, delete selected adjustments and add new adjustments, all non-destructively. This does of course have a performance overhead. Therefore the option to merge the adjustments into the layer permanently using a button at the bottom is also part of this dialogue.
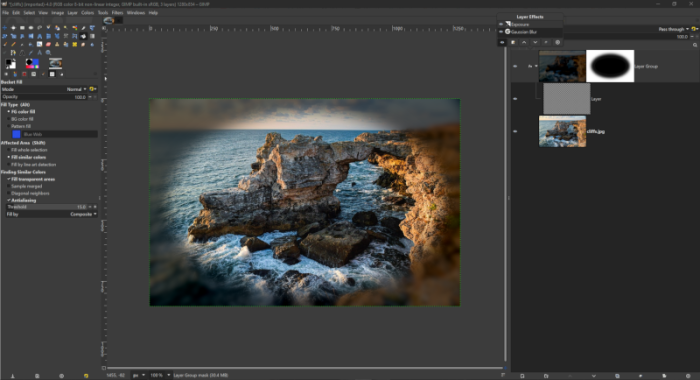
You can also add maskable adjustment layers to a layer group now. This is a little more complex and the workflow is detailed in this video. You first add a transparent layer to a layer group. Next set the layer group’s blending mode to “passthrough”. You can then apply the desired filters to the layer group. Finally you may add a mask to the layer group on to selectively apply them to the underlying image. Note that while the transparent layer in the layer group is not altered, it is essential that it is present. Below is a screen shot showing this method being used to apply a blur and vignette to an image. Note the open filters dialogue in the top right.
Text Improvements
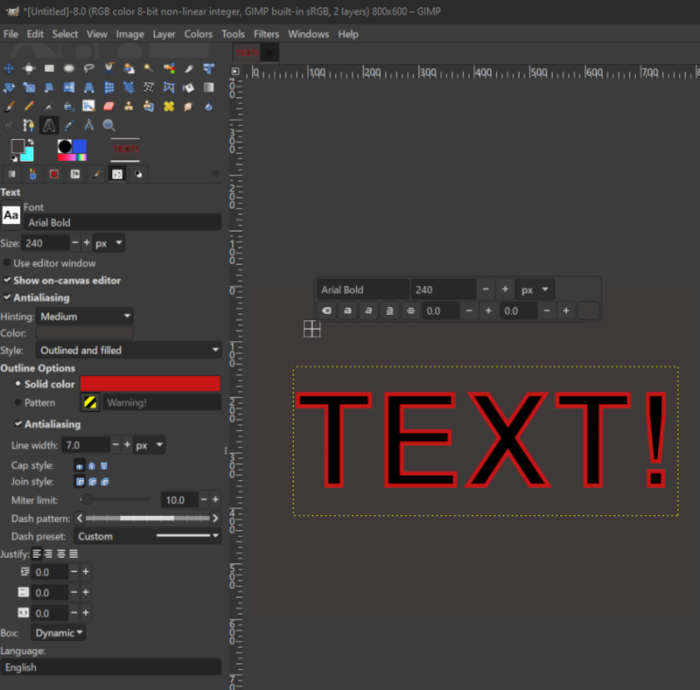
Options for text now allow you to handle the outline and fill on text. This allows for a wider variety of text effects. To adjust the stroke and fill separately open the text tool options and select “outlined and filled” from the drop down. You can then select the options for the outline effect. Strangely you can apply pattern fills to the outline, but not to the fill of the text. This is not a major issue since there are other ways to get pattern filled text.
 get it?”
Non Destructive Clipping Masks
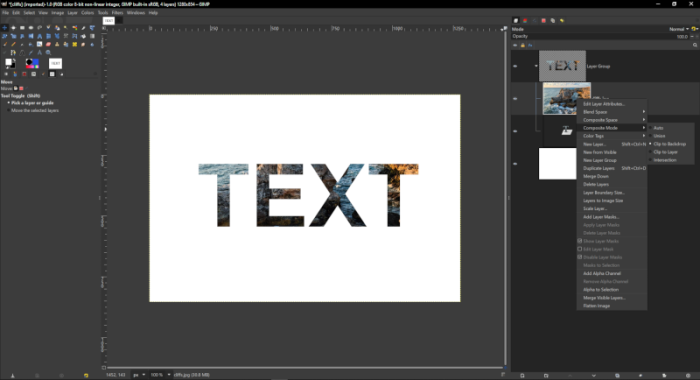
GIMP 3 now supports non-destructive clipping masks. To set one up place a background layer beneathe a layer group which contains a texture on top and the desired shape to clip to underneath. Then right click on the texture layer and select Composite Mode > Clip to Backdrop. Here is a useful video tutorial about clipping masks.
Other Improvements
Layer cut and paste now pastes to a new layer rather than to a floating selection which re-anchors to the original layer unless you explicitly convert it to a new layer. This is a nice quality of life improvement
You can now control select multiple layers to move them together. To do so ctrl click the layers you want to move together to select them and then shift click on the layer and move with the mouse to move them all (not using shift will still move one layer). Note that multiple selection removes the layer and filter menu options so you cannot use this for things like tone adjusting multiple layers in synch unfortunately. Transform tools do work on multiple layers but you only get to see one layer while adjusting so use with care.
Other general improvements are laid out in the release notes and in this video
Launching GIMP 2 when you have GIMP 3 installed
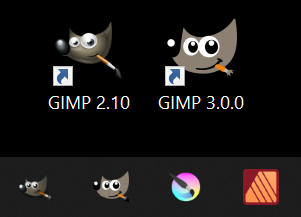
Some old plugins may never make it to GIMP 3. If you rely on those, you may need to be able to open GIMP 2 despite having GIMP 3 installed. The good news is that if you use the standard install locations for GIMP 2 and GIMP3 on Windows you can still use either package. The solution I have found to this is to place shortcut links for the two executables on my desktop. I found the GIMP 2 executable at `C:\Program Files\GIMP 2\bin\gimp-2.10.exe` and the GIMP 3 executable at `C:\Users\<user>\AppData\Local\Programs\GIMP 3\bin\gimp-3.exe`. Placing shortcuts on my desktop allows me to open either ( but not both). You can pin both to the start bar as well. The bad news is that it appears you cannot use them both at the same time, but this workaround should deal with most issues.