With the current pandemic a lot of people are playing role playing games online. Others are using the time to craft dungeon terrain for when games can happen in person again.
There are a lot of approaches to creating dungeon maps and scenery out there. However one of the more interesting approaches is the 2.5D approach that was introduced by DM Scotty of the DM’s Craft. This uses low rise tiles to make both play and storage easier. This was then refined by Chris of Crooked Staff Terrain by using printed textures to create the 2.5D tiles. Crooked Staff Terrain offer a wide range of textures on a “pay what you want” basis on Drive Thru RPG
Crooked Staff Terrain provide a series of excellent tutorials on how to use their textures to make terrain. However what if you want to make your own textures to fill in for something that has not yet been made? Well here are a few pointers for how to make such textures in the free open source GIMP image editor. Lets make a simple stone floor as an example
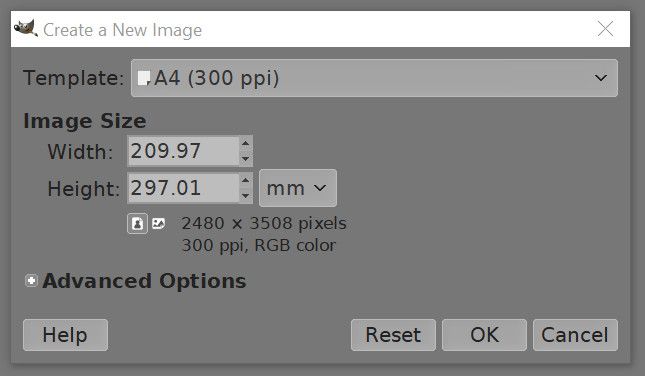
First decide how big you want your image, and at what resolution. Be aware that file sizes can get quite large for large high dpi images. 72 DPI will likely suffice for online maps while 300 DPI is more likely to be suitable for printing. Use Ctrl-N for a new image and select size and DPI
Next we want a suitable texture. This would be tricky if not for the fact that there are some excellent sources of CC0 tileable textures out there. Two of the most useful are cc0textures.com and 3dtextures.me . While these textures come with bump maps, normal maps and so on, the only texture we need for our purposes is the diffuse map. not all diffuse maps are useable, but many are and these sites have stone, wood, tiles, metal and many other textures you might want to use.
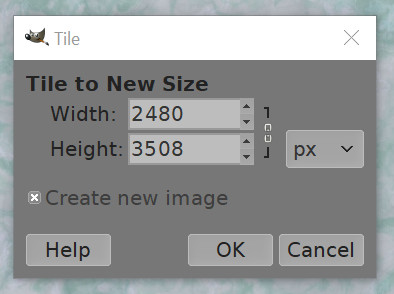
Open your chosen texture in GIMP and then use image>image properties to check the size of your desired image. Then use filters>map>tile to tile your downloaded stone texture to the size of your desired image. Then select the tiled image with Ctrl-A, Ctrl-C and paste it back into a new layer in your original image, this ensures that the DPI will be correct in a simple way. Don’t forget to right click your new layer and select to new layer
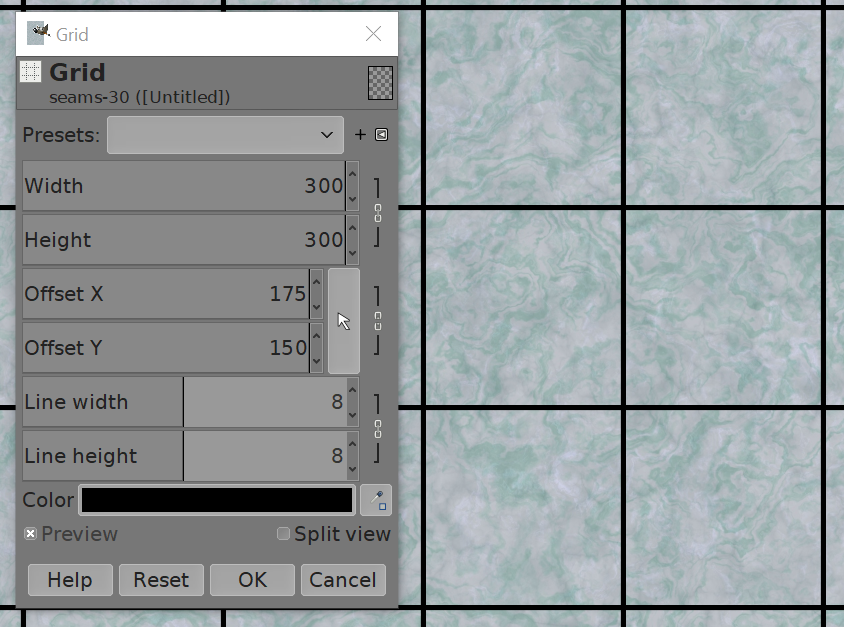
Now we need to add a tile grid. Fortunately Gimp has us covered. Use filters>render>pattern>grid… to set up a grid for your tiles. Remember that you know the DPI of your image which allows you to set a precise size for your tiles.
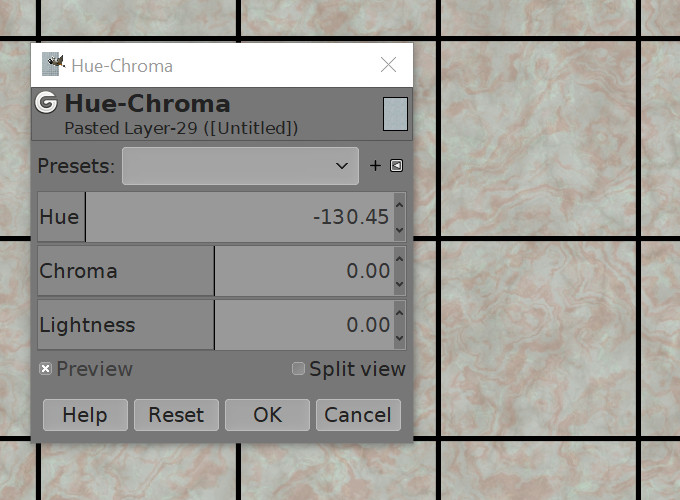
Finally we may want to adjust colours in our stone or tile grid. Two different methods work well here. To recolour the stone, the easiest method is to use colors>hue-chroma and then adjust the hue as desired.
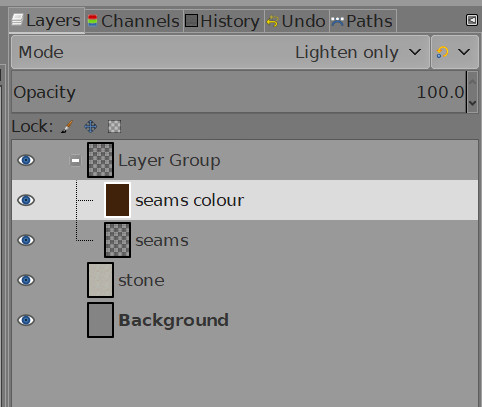
To recolour the grid lines another method works well. Add a layer group and drag the grid lines into it then add a layer above it, fill that layer with the colour you want for the grid lines and then change the blending mode of that filled layer to lighten (assuming you had black lines) to colour your lines.
And that’s it! You have a texture you can print and paste for 2.5D tiles. Obviously there is also a lot more you can do here. You can add stains and grime to your floor, build other types of texture or overlay a different stone texture and use a mask with it to create a dungeon map, with the overlaid stone texture representing the cavern walls.